Embroidery digitization is a crucial process in creating custom embroidery designs. Whether for personal or commercial use, understanding the intricacies of this process is essential for achieving high-quality results. In this guide, we’ll delve into the tips and techniques necessary for successful custom embroidery digitization.
Understanding Embroidery Digitization
Embroidery digitizing involves converting artwork into a format that embroidery machines can interpret and stitch onto fabric. Firstly, it’s crucial to grasp the basics of this process. Secondly, understanding the tools required, such as digitizing software, is equally important. Additionally, familiarizing oneself with the various software options available is essential for choosing the right one for your needs.
What is Embroidery Digitization?
Embroidery digitization is the process of converting artwork into a digital format that can be read by embroidery machines. This involves meticulously mapping out each stitch and color to recreate the design with accuracy. Think of it as creating a blueprint for your embroidery design.
The Importance of Custom Embroidery Digitization
Custom embroidery digitization allows for unparalleled creativity and customization. Whether you’re digitizing a company logo or a personalized design, achieving high-quality results is essential for making a lasting impression. Without proper digitization, even the most intricate designs can end up looking distorted or messy when stitched out.
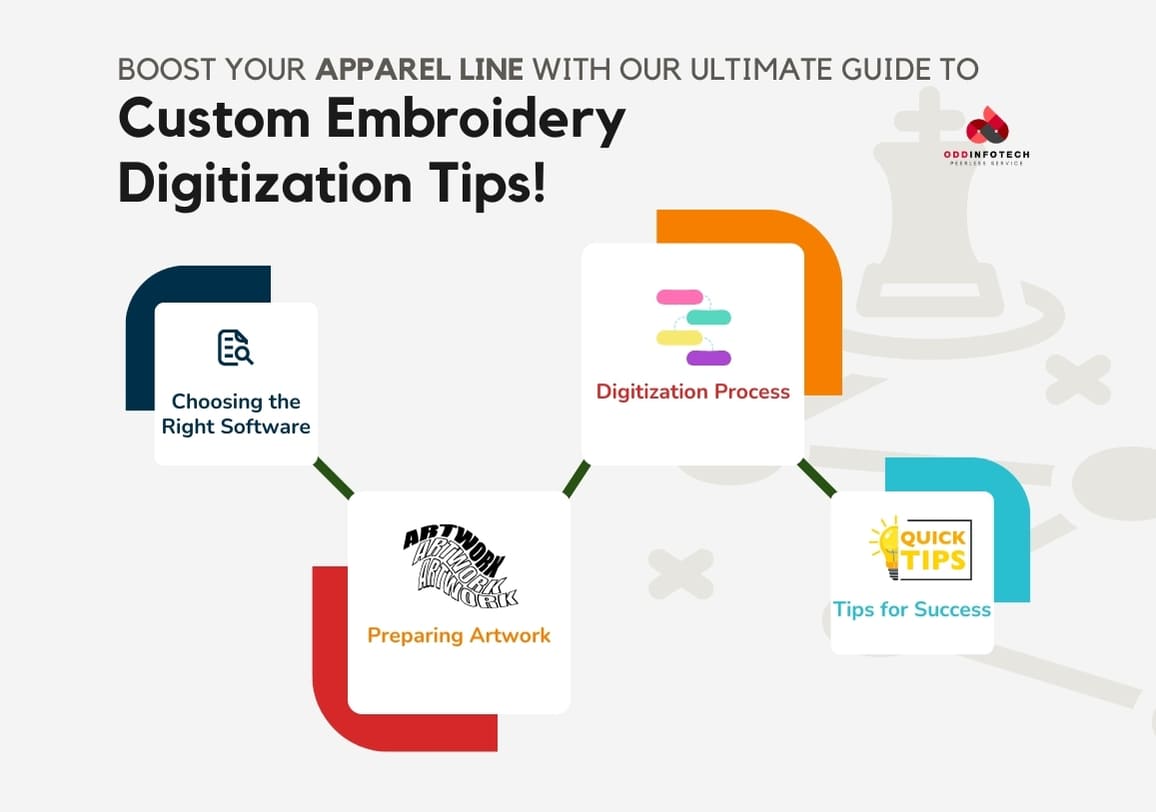
Key Components of Custom Embroidery Digitization
Preparing Artwork for Digitization
Before diving into the digitization process, it’s essential to prepare your artwork properly. Think of it as laying the foundation for a building – the stronger the foundation, the better the structure.
Choosing the Right Artwork
Not all artwork is suitable for embroidery digitization. When selecting artwork for digitization, opt for designs that are clear, simple, and have well-defined lines and shapes.
Cleaning up the Design
Once you’ve chosen your artwork, it’s time to clean it up to ensure optimal results during digitization. This may involve removing unnecessary elements, simplifying complex details, and enhancing clarity where needed.
Choosing the Right Software for Custom Embroidery Digitization
Firstly, Selecting the right digitizing software is absolutely crucial for successful custom embroidery digitization tips. Secondly, ensure compatibility with your embroidery machine. Moreover, factor in the software’s ease of use and price when making your decision. Specifically, popular digitizing software options include Wilcom EmbroideryStudio, Pulse Embroidery Software, and Hatch Embroidery. In particular, each of these platforms offers unique features tailored to the needs of professional embroiderers.
Understanding File Formats
Convert your designs into the appropriate file format supported by your embroidery machine. Common formats include DST, PES, and EXP.
Custom Embroidery Digitization Tips for the Perfect Stitch!
The Digitization Process
Now that you have your artwork and software ready, it’s time to dive into the digitization process itself. This is where the magic happens, as your design comes to life in digital form.
Step-by-Step Guide
Step 1: Streamlining Custom Embroidery: Importing Designs for Digitization
The first step is to import your artwork into the digitizing software. This allows you to work directly with the design and make any necessary adjustments.
Step 2: Setting Stitch Types and Directions
Next, you’ll need to select the appropriate stitch types and directions for each part of the design. This step is crucial for achieving the desired texture and appearance in the final embroidery.
Step 3: Adjusting Stitch Density
Stitch density refers to the number of stitches per unit area in the design. By adjusting stitch density, you can control the overall look and feel of the embroidery, ensuring optimal results.
Step 4: Finalizing the Design
Once you’re satisfied with the digitized design, it’s time to finalize it and prepare it for stitching. This may involve reviewing the design for any errors or imperfections and making necessary adjustments.
Tips for Custom Embroidery Digitization
Embarking on a custom embroidery digitization project requires careful planning and execution. Here are some valuable tips to enhance your digitization process:
Start with High-Quality Artwork
Firstly, the quality of the original artwork significantly influences the digitization process. Therefore, it is essential to begin with high-resolution images or vector files to ensure clarity and precision in the final embroidery.
Mastering Custom Embroidery Digitization: Stitch Types and Techniques
Secondly, familiarize yourself with different stitch types and their applications. Additionally, selecting the appropriate stitch type for each element of the design can enhance the overall appearance and texture of the embroidered piece.
Optimize Stitch Density
Furthermore, pay close attention to stitch density, as it affects the coverage and durability of the embroidery. Moreover, adjusting the stitch density according to the fabric and design complexity can prevent puckering or thread breaks.
Test Before Production
Moreover, always conduct test stitches before initiating full-scale production. Consequently, this allows you to identify any potential issues or areas for improvement before committing to the final embroidery.
Custom Embroidery Digitization Designs
With the digitization process complete, it’s time to explore the world of custom embroidery designs. This is where you can let your creativity shine and create unique, one-of-a-kind pieces.
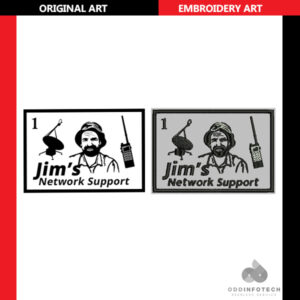
Experience the beauty of custom embroidery digitization designs crafted with precision and creativity.
Tailoring Designs to Suit Different Fabrics
Different fabrics require different approaches when it comes to embroidery. For example, designs for thick, textured fabrics may require adjustments in stitch density, while delicate fabrics may require finer stitches.
Converting Designs for Different Formats
In addition to fabric considerations, it’s also essential to consider the final format of the design. Whether you’re embroidering on clothing, accessories, or home decor items, adjusting the design to suit the format is crucial for achieving optimal results.
Ensuring Quality Results
Once you’ve digitized and customized your embroidery design, it’s time to ensure that the final results meet your expectations. After all, quality is paramount when it comes to custom embroidery.
Quality Assurance in Custom Embroidery Digitization: Testing Your Designs for Perfection
Before stitching out the design on the final fabric, it’s essential to test it on a similar material. This allows you to identify any potential issues and make necessary adjustments before proceeding with the actual embroidery.
Making Adjustments as Needed
Even after testing, it’s not uncommon to encounter minor issues or imperfections during the embroidery process. In such cases, don’t hesitate to make adjustments to the design or settings to ensure the best possible outcome.
Troubleshooting
Encounter issues? Don’t panic. Common problems like thread breaks or puckering can be resolved with proper tension adjustments and needle selection.
Best Practices
Consistency is key. Maintain a standardized approach to digitization to ensure uniformity across all your designs. Document your settings and processes for future reference.
Conclusion
Embroidery digitization is both an art and a science, requiring skill, creativity, and attention to detail. By following the tips and guidelines outlined in this comprehensive guide, you can unlock the full potential of custom embroidery digitization and create stunning, professional-quality designs. We invite you to put these tips into practice and share your experiences with us in the comments below.
FAQ’s About Custom Embroidery Digitization
How do I choose the right digitizing software?
To select the best digitizing software for your needs, consider factors such as features, compatibility, ease of use, and price.
What file formats are suitable for artwork preparation?
Vector formats like SVG and high-resolution raster images such as PNG or JPEG are ideal for preparing artwork for digitization.
Can I digitize embroidery designs without software?
While it’s possible to digitize designs manually, using specialized digitizing software streamlines the process and ensures better results.
What are some common challenges in embroidery digitization?
Common challenges include maintaining stitch quality, accurately reproducing intricate details, and achieving proper thread tension.
How can I ensure my digitized designs stitch correctly on fabric?
Previewing the design within the digitizing software and conducting test stitches on similar fabric beforehand can help ensure proper stitching.
Is embroidery digitization suitable for beginners?
While it may seem daunting at first, beginners can learn embroidery digitization with practice, tutorials, and experimentation.


Leave A Comment